10/28/15

Continuing Watercolor (October, November, December 2015)

I added some detail and dark values to the horse and corrected some issues (and made some new ones that need correcting...).  I added shadow to the snow and texture and vegetation to the background woods area.  I then used white gouache to fix and change a few areas on the horse and the background.


This is a yupo example from another class.  I used it to show how to add darks back in, by dabbing/pouncing them in.  I also changed the background with the blue and some of the blue now needs to be added to the left side.

This is a half sheet 300 lb. paper taped to a board to keep it flat.  I transferred the drawing and masked the fish as well as used masking fluid to make some water texture marks.  I rubbed the masking on small spots on two of the fish to allow dark to get through to make spots on the fish.  I then poured paint.  I mixed 2 greens, 2 blues, and a yellow.  I also splattered some paint as well.  The next step is to mask again before a second pouring.

Sertoma Mixed Media (October, November, December 2015)

I added more dark and more light on the dragonfly with the pens.  Values, values, values.


This is the second pass of rubber cement and watercolor.

This started with an under painting in watercolor.  I have worked on the top section with colored pencil (scarlet lake, crimson, pomegranate, canary yellow, white, indigo) 

This is the Plexiglas project.  The front has Liquitex Clear Gesso (there is a small L in the corner).  The back has Daniel Smith Transparent Watercolor Ground.  To apply the grounds/gesso I lightly sanded the plexi on both sides.  I wiped off the dust and used a brush to apply a thin layer of the ground/gesso.  A foam roller could also be used.  I let them dry for 72 hours (24 will work, 72 is better).  To start, I traced the drawing with pencil (I placed the drawing under the plexi with the Liquitex side facing up and traced with a #2 pencil).  I have used Sienna Brown and barely started shading the shadowed areas.  I added some white in the highlight areas as well.  

10/24/15

BAL Mixed media (October 2015)

I added a little more ink to this piece.

I finished adding the blue to the background.  I worked on some of the buds and leaves, i still have some to finish of course.  

I added more watercolor pencil to the ornament on the left.  I added more colored pencil over the watercolor on the ornament on the right.

I added a little more colored pencil to the ornament on the left.

I have added quite a bit more colored pencil to her face and hair.  There is more work to be done, some refining and adding of more values and color.

This is a piece also on plexi done as a demo in a workshop.  it is a bit further along than the one we have done.  I have a bit more to do, but it is close to complete.  I used the same process that we did in class.

This is a piece started on yupo.  First I added color to the yupo and allowed it to dry.  Then I transferred the drawing with white transfer paper.  I used a brush with water and a paper towel to remove some of the color to create values and form.  I added some color back in some places.  the background especially needs work and the whole piece needs refinement.

This is yupo with the color I applied in class.

Continuing Watercolor (October, November, December 2015)

Transferred drawing, masking to save the whites, and splattered masking for snow (applied with a toothbrush).  After the masking dried I did a pass of blue-gray wash

I did 2 more passes of blue-gray. Then I painted the horse and started adding some brown and trees in the background.  This is enough for the masking to be removed.

I have removed the masking.  Lots more work is needed.

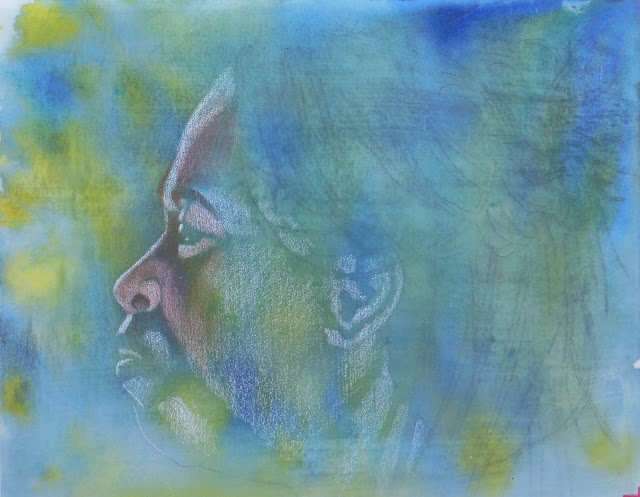
This is watercolor on yupo.  I applied a dark blue and rose to the yupo and allowed it to dry.  I did a medium dark valued color.  Then I transferred the drawing with white transfer paper.  Next I used a damp brush and paper towel to start removing some of the color to create values and form.  I added some pink to the glasses.  There is still a lot to do, but it is a good start (need to finish the face so it does not look freaky...).  I will demo more in class.

10/22/15

Sertoma Mixed Media (October, November, December 2015)

This started with the background.  I used bristol board and watercolor.  I wet the paper and dropped in the color and left it.  After it was dry I transferred the drawing (only the essential lines).  I then used black and white ink ( a black acurit pen and a white jelly roll pen).  I have used line, pointillism, scumbling/scribbling marks.

This started with the background, acrylic on watercolor paper (student grade).  I wet the paper, dropped in color, and put plastic wrap over it and let it dry.  I have used a black acurit pen, white acrylic, and colored pencil.

Plastic wrap texture.  Wet the paper, drop in color, place the plastic wrap on top (bunch it up some), allow to dry.  For all of these textures you can use watercolor, acrylic, or gouache.

Wax Paper texture.  Wet the paper, drop in color, place the wax paper top (crunch it a little first), place a book on top, allow to dry.

Salt texture.  Wet the paper, drop on color, when it is still shiny but not a puddle sprinkle on salt (you can use a variety from table salt to sea salt, etc.), allow to dry, brush the salt off.

Rubber cement texture.  Dribble and/or brush on rubber cement, allow it to dry, wet paper and drop in color, allow it to dry, dribble and/or brush more rubber cement, allow to dry, wet paper and add paint, etc. for as many layers as you wish (I usually do 3 - 5).

Wet paper, drop in color, allow it to dry.

Wet paper, drop in color, splatter with color, allow to dry.

The ornament on the right has a watercolor under painting.  I have started putting the Prismacolor colored pencil on top.  The ornament on the left has an Inktense watercolor pencil under painting.  I just started putting the Prismacolor colored pencil on top.

Watercolor under painting on Stonehenge paper. 

More watercolor on Stonehenge paper.  The next step will be using my Prismacolor colored pencils.

This is something I showed in class.  I did this in a class with Jackie Balog.  It is done on a watercolor canvas panel.  We transferred the drawing and painted the background with black gesso.  We then used Inktense watercolor pencils and colored on the bird, branches, leaves, and background and wet it.  After it was dry we sprayed it with workable fixative and drew with Prismacolor colored pencils.  It needs more color and dark values, but  I am close to complete.

10/21/15

BAL MM October 2015

I did a tiny bit more ink work on this.

I added colored pencil to the background and did a bit more on the flower.

I did more watercolor pencil work on the left ornament and a bit more colored pencil work on the right ornament.

10/17/15

BAL MM (October 2015)

I added colored pencil to the flower and a bit more to the background.  I also worked on the stem some.  I also showed you a bit of melting on parts of the flower, leaf, and bud (with the Goo Gone Spray Gel).  Remember also that when I work at home on a non demo artwork I work all over, not in bits and pieces as I do for the demos.

I worked on the watercolor for the right side ornament at home so i could add colored pencil in class.  The ornament is cattywampus, so I will need to fix that.

Addesd yellow watercolor pencil on the left ornament.  Started adding colored pencil on the right side at the top (and I started to fix the cattywampus...).

Plexi glass with Liquitex Clear Gesso on the front side and Daniel Smith Transparent Watercolor Ground on the back side.  I have traced the drawing.

I put watercolor on the back making a textured background.  I started putting colored pencil on the front side.  I started with white and then used dark brown, sienna brown, and peach so far.

10/14/15

Continuing Watercolor (August, September, October 2015)

I worked on this adding lights and darks mostly.  It's a combination of hard and soft edges (a lot of painting the dark area and pulling it out with a damp brush).  I worked on dry paper.  It still needs a few details.  I used viridian and indigo on the coat, cobalt and indigo on the shirt, a grey made with alizarin and viridian for the hat, and mostly indio, cobalt, and viridian on the scarf along with a small amount of mixed grey.  The browns are burnt sienna and a mixed brown (burnt sienna and indigo and a little alizarin) and a mixed black (alizarin and phthalo green)

10/8/15

BAL MM (October 2015)

I started adding black and white ink to the dragonfly.  I am scribbling/scumbling and using some pointillism.  I will do some of the detail, as needed.  But I have no plans to do every single line in the wings.

I started adding colored pencil to the watercolor.  I worked on the bud and the leaf as well as the background to the left of the bud.  Remember, I worked in small areas for demonstration purposes, but I would normally work on the entire piece and building it up together.  I used a light green, dark green, yellow, dark blue, and red colored pencil.  On the bud I added no more watercolor.  On the leaf I added a yellow glaze before starting with the colored pencil.

This is on the Stonehenge white paper.  On the left I used watercolor pencils for an under drawing (2 reds and 2 yellows so far).  Then I switched to the wax pencils using 1 red, 1 yellow, and white so far.  On the right I started with watercolor doing an under painting ( 2 reds and 1 yellow).

10/7/15

Continuing Watercolor (August, September, October 2015)

I did a little negative painting, some texture with the paint (lots of dabbing), added a few more darks, worked on the fence a little, etc.  This painting needs darks and work on the bottom of the fence.

I added a yellow glaze to the left side of the background (plan to do the right side as well).  I added more details to the flower, buds, and leaves.

Removed the masking and added a few spots of darks and details.

I started this with the paper dry and very loosely.  I used very watered down color leaving some of the edges as they will add texture later.

10/2/15

BAL Mixed Media October 2015

Watercolor (could do the same with acrylic).  I wet the paper and dropped the color, let it dry.  This is for the dragonfly.  I have transferred the drawing onto the paper.  I transferred the outline and some of the details on the body and head.  I will draw the lines on the wings (some of them) with ink.

Watercolor (could do the same with acrylic).  I wet the paper, dropped in color, placed the plastic wrap on top and scrunched it until I got shapes I liked.

Acrylic (could do the same with watercolor).  I wet the paper, dropped in color, placed the crumpled wax paper on top and placed a book to hold it down.

Watercolor (could do the same with acrylic).  I wet the paper, dropped in color, and when the paper was not a puddle and still a little shiny I dropped in salt in those areas.  I used bot table salt and sea salt.  The table salt is the tiny textures and the sea salt has the larger texture.

Watercolor (would do the same with acrylic).  This painting will start as a monochromatic painting.  For the petal I worked with damp paper and dropped in color (in the dark areas) and guided it.  On the buds I worked dry and pulled the color out.  On the background I worked very wet and let the color move.  The purpose here is to learn to work with the various wetness of the paper and to focus on value painting.