8/31/13

Continuing Watercolor (Sept./Oct 2012)

Watercolor and a little gouache.

Aqueous Acrylic (April 2013)

Acrylic starting with a textured background (wet, add color, add salt).  The image is superimposed over the top with the background peeking through in areas.

8/30/13

Myrtle Beach Mixed Media Workshop

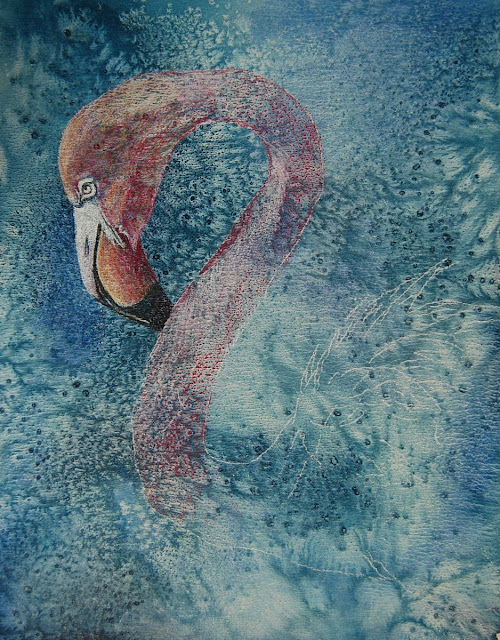
Colored pencil over a textured gouache background (made with salt).

Exploring Colored Pencil (August 2013)

Colored pencil on Dura-Lar Matte.  This is a background for the dura-lar piece.  I have taken a white paper and melted, painted, and splattered colored pencil with Goo Gone going around the flower (which I transferred onto the paper)

Colored pencil on Dura-Lar Matte.  This is the piece with some of the black and white side done as well as some of the color side done.  Iy has a white background.

Colored pencil on Dura-Lar Matte.  This is the background and Dura-Lar together.

Colored pencil on a dark surface.  The color for this is not correct, I could not get a good photo, sorry.  I mostly used white as well as a few basic colors concentrating on the values.  I then melted it with Goo Gone.  I will work more on top in class.

Colored pencil over a melted under drawing.  For this I used two methods.  I melted the pencil in a lid and then painted and splattered it on the paper (pay attention to values).  I also drew some on the paper and then melted it (pay attention to values).  I may do m ore melting and then work on top with colored pencil.

Exploring Gouache (August 2013)

Local Color.  I added more red as the dark I had added was too much.  I also added white to the bottom to show how the value can be altered further.

Value Study.  I added the red over the top of the value under painting.  I also added some white and green.

Gouache over a textured background.  First I transferred my drawing and then added  started with the light areas (with white).  I also worked on the dark areas (with a mixed dark red/pink color and a mixed black color).  Getting the values working is key.  Allow gouache to dry thoroughly before working on top as it lifts easily.

8/18/13

Myrtle Beach Mixed Media Workshop (July 2013)

Textured surface - bubble wrap.  Wet work surface, drop in color, place bubble wrap on work surface, place something heavy on top (like a few books).  This can be done with acrylic, watercolor, or gouache.

Colored pencil over gouache on paper.  The texture was done with salt.

Colored pencil over watercolor on masonite prepped with watercolor ground.  he texture was done with salt.

Colored pencil over watercolor on paper.  The texture was made with plastic wrap.

Colored pencil over acrylic with a texture made by rubber cement and prepped with acrylic ground for pastel.  

Pen & ink and colored pencil over watercolor, the texture was made with rubber cement.

Textured surface - rubber cement.  Drizzle rubber cement onto the work surface, allow to dry, put color on (my first few layers are usually light), allow that to dry.  Drizzle more rubber cement, dry, add more color, dry - keep repeating this for as many layers as you like.  I usually do 3-7 layers.  This can be done with acrylic, watercolor, or gouache.  With acrylic and gouache you can also do this starting with a dark color and working toward light color.

Textured surface - salt.  Wet work surface, drop in color, put salt on when the surface is shiny, not puddles.  You can use different sized salt for different looks.  This can be done with acrylic, watercolor, or gouache.

Textured surface - wax paper.  Wet work surface, drop in color, place wax paper onto work surface, place something heavy on top (like a few books).  This can be done with acrylic, watercolor, or gouache.

8/16/13

Exploring Gouache (August 2013)

Gouache with a salt texture.  Wet the paper, drop in color, add salt when the paper is shiny, no puddles., allow to dry before brushing off the salt.

Gouache with a plastic wrap texture.  Wet the paper, drop in color, place the saran wrap on top and press down, allow to dry before removing the plastic.

Local Color gouache.  I paint the tomato red and the stem green first.  During the second pass I added a dark and white for shadow and highlight.  This is of course not complete.

Value Study gouache.  In this method I dampened the tomato and shadow areas and painted a value study with one dark color (the white of the paper becomes the light areas).  This is gouache used more as watercolor.  This is an under painting - we will add color on top.

Exploring Colored Pencil

Colored pencil on Dura-Lar Matte.  Remember to do a value study with black on one side and color on the other.  This is shown from the black and white side.

photo for class

8/13/13


Photos for classes