10/27/16

NCBG ICP November 2016

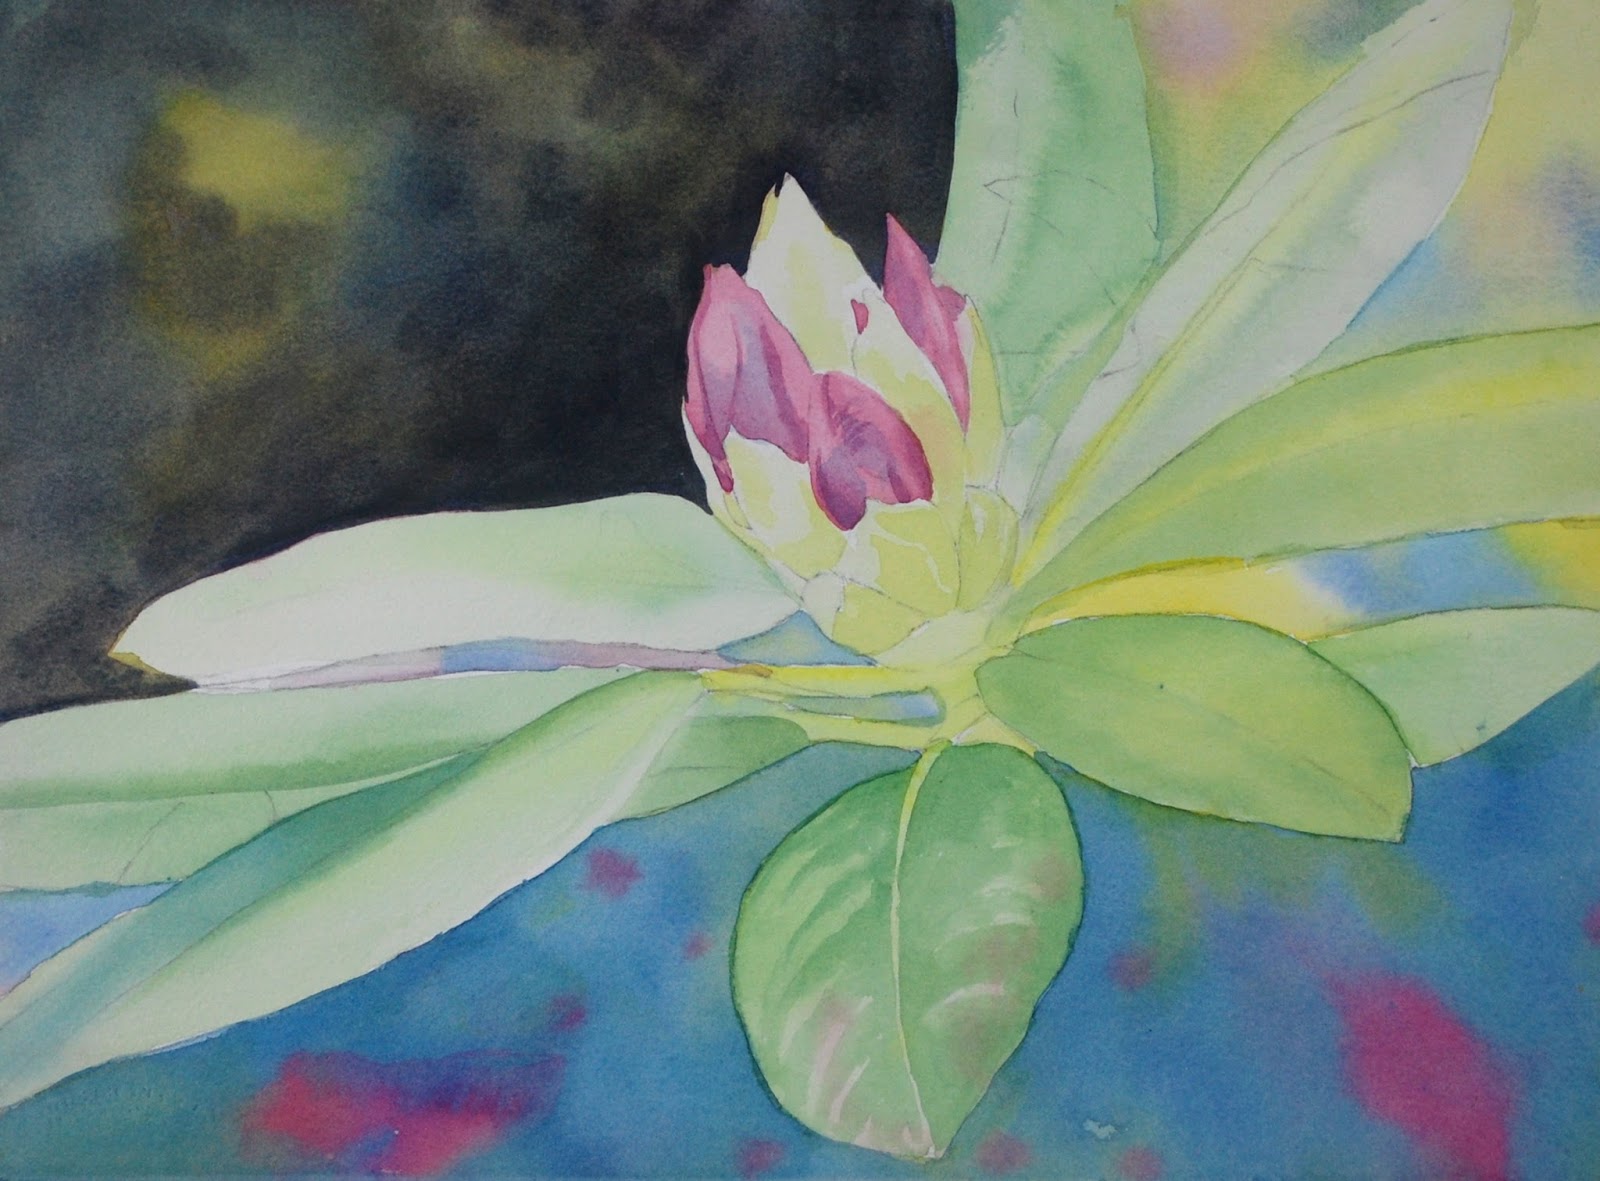
Colored pencil on dark.  I start with white and do a value study.

I then cover all the white in canary yellow.  I left things unfinished for demonstration purposes.

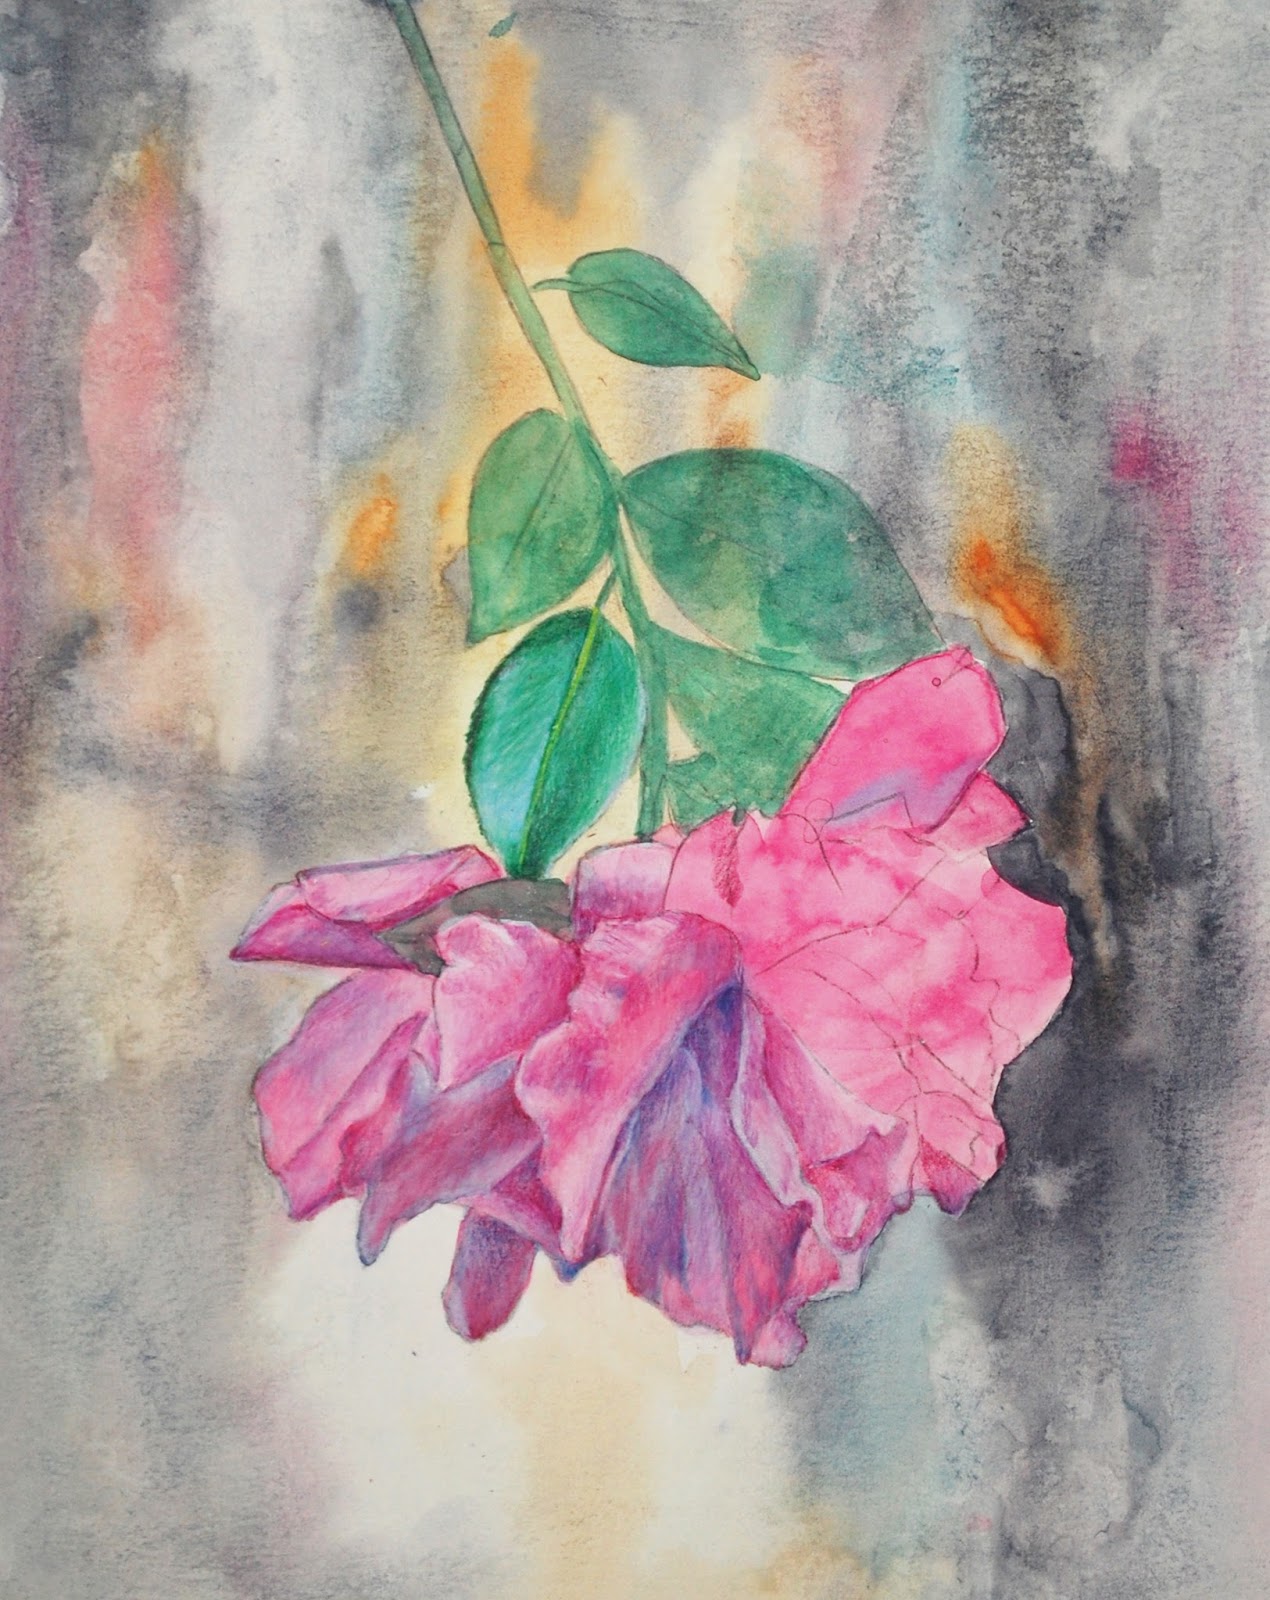
I started working on the petals using spanish orange to warm it up along with scarlet lake and cad orange for shadow areas, and white and cream to blend and lighten as needed.  I added true blue to grey the orange in some shadow areas.  I used indigo with scarlet lake on top for the dark areas.  I used all the colors layered and textured for the center of the flower.  I used white to add texture.  On the stem I used indigo to mix with the yellow and make green.  I added red to the green as well and used white on the highlighted side and to make the hairs. 

Wakefield Vet Class

Continued refining the owls head (still more to do) and started working on his body.  I used spanish orange and cream as the main color.  I used dark brown, sienna brown, and black on the spots.  I used whit and cream for highlights and use some cad orange in spots as well.

Sertoma CW October & November 2016

I worked a little more on the petals and the shadows on the leaves.

I darkened the background (so now need to fix the edges of the ornaments), added more pine needles, and shaded the snow a bit more. 

I started with a very light rose, ultramarine blue, and aureolin yellow.  I worked upright and painted the colors from top to bottom concentrating on the skin and pulling colors out into the painting.  I let that dry.  I mixed a skin color (rose plus aureolin yellow) and started painting the shadows.  I let drips and splatters happen and added more as desired.

C & C

We worked on the right side of the body and the head.  It still needs work on the head, it needs darks and details.  And a little more on the body.  

10/24/16

NCBG IEW October, 2016

I demonstrated the magic eraser on the bottom right (and then glazed with yellow).  I demonstrated white gouache on the seed pod.  I reestablished the light areas with gouache and then glazed those with yellow.

I started painting after removing the masking.  I am using the same colors that I used for pouring rather than the colors in the photo.  You can use a black and white photo to work from in order to focus on the values.  Remember to make decisions based on your painting rather than basing them on the photo at a certain point in the process.

First I painted a light wash of the background color to reestablish my subject matter (it was hard to see).  They I mixed an orange and started painting the mushroom.  I started painting the gills.  I painted some of the lines and then messed then up a bit in a few places so they would not look too uniform.I painted some orange in the background to help ground the mushroom.  I also grounded it by darkening the base a little.  This is at the very beginning.  It needs more darks and details.

10/20/16

Wakefield Vet Class

CP on UART sanded pastel paper.  Added more darks, color, and details.  Used indigo, true blue, white, and black for the beak.  Added cream as well.

Continuing WAtercolor Sertoma, October and November 2016

I started working on some of the leaves and the petals adding shadows.  I also demonstrated lifting with a wet brush and a scrubber brush.

I shaded the snow with blue (I used ultramarine, but cobalt and other blues would work fine).  I used a blue green to start making the pine needles.  I mixed some darks and started detailing the ornaments (which is basically drawing with paint).  I demonstrated lifting with a magic eraser pad.

C & C Class

Acrylic on paper.  Worked on the troublesome drips a bit more as well as adjusting the values a little bit

Worked on the leaves and petals a bit more, adding some shadows.

Worked on the leaves and petals, adding more shadow and color as well as some detail.

Acrylic on paper.  Still refining.

Acrylic on paper.  Started the cows, painting the values.

10/18/16

BAL Mixed Media, September 2016

Colored pencil on mat board.  I have worked on the petals and center a bit more, refining and adding details.  I also added more warm yellow to the petals.  I of course still need to do the very unfinished petals. 


Colored pencil over a textured background on cold press watercolor paper.  I have refined a little more and added some more detail.  It needs more work before being complete.

Colored pencil over a watercolor under painting on Stonehenge paper.  I have worked quite a bit on this adding shadows, highlights, and details. I added more yellow to the background.  it is close to complete.

NCBG IEW October 2016

Pouring.  This is after the first masking and the first pour with yellow, orange, and red.
Pouring.  I did a 2nd masking of light areas.  Sprayed the painting with water and did a second pour with yellow, blue green, and yellow green.  I placed the colors.  Later I did a 3rd round of masking, spayed the painting with water, and poured red, yellow, and orange.  I placed the colors and then moved it around allowing the drips to spread and stay.  I wanted a messier under painting.


This is a light textured under painting and background for the mushroom.  I used light color and plastic wrap.

Sanding Textures. Left - I wet the paper with yellow color.  I then used watercolor pencils and scraped them onto the wet paper with a small strainer (can also use sand paper or an emery board).  Right - I scraped watercolor pencil onto a dry surface and them sprayed it with a fine mist of water. 

Plastic wrap and salt textures.  Left - wet the paper, drop in color, place the plastic wrap and scrunch it some.  The dark color will stay where the plastic touches the paper.  The light areas are the air pockets.  Right - Wet the paper, drop in color, when the paper is shiny but not a puddle sprinkle with salt.  Different sized salts make different textures.

Bubble wrap and wax paper textures.  Left - wet the paper, drop in color, place the bubble wrap on the paper and put something heavy like a book on top.  The dark color will stay where the plastic bubbles touch the paper.  The light areas are the air pockets.  This was really stiff bubble wrap and made a different texture then usual.  Right - wet the paper, drop in color, crumple the wax paper and place it on the wet surface and place something heavy like a book on top.  The dark color will stay where the wax paper touches the surface.  The light areas are the wrinkles/air pockets.

Rubber cement texture.  This has an older part of dribbled rubber cement and light greenish paint and splatters.  In class I painted some rubber cement with the brush in the bottle and then wet the paper and painted yellow on top.  It needs a few more layers of rubber cement and paint.  I typically do 3 - 7 layers.

NCBG IEW October 2016

Finished the pours and masking, finished the direct painting, removed the masking, started incorporating and softening the white/light areas after the masking is removed.  Still quite a bit to be incorporated/fixed.  I find that when I use masking I must make adjustments after I remove the masking.  I can soften many areas with a damp watercolor brush.  Just paint over the area with the damp brush and it is softened.  Other areas must be painted a color or painting must be done around the area.  This also still needs value adjustments, shadows, details, and refinement as well as the masking fixes.

10/17/16

NCBG IEW, October 2016

Transfer the drawing and mask out the lightest areas.  The paper is taped to a board for support.

Sprayed the paper with water.  Poured with red, orange, and yellow,  very light color mixed with water in a small jar.

Did another round of masking in the next lightest areas and allowed this to dry.  Sprayed the paper with water.  Poured yellow green, blue green, and yellow in specific areas.  Can use a pipette here if you wish.

Sprayed the paper with water. Poured using red, orange, and yellow in specific areas.  Can use a pipette here if you wish. 

Started painting areas with a watercolor brush.  Have not removed the masking yet, that will come after the first round of direct painting.
Finished the direct painting, removed the masking, started incorporating and softening the white/light areas after the masking is removed.  Still quite a bit to be incorporated/fixed.  I find that when I use masking I must make adjustments after I remove the masking.  I can soften many areas with a damp watercolor brush.  Just paint over the area with the damp brush and it is softened.  Other areas must be painted a color or painting must be done around the area.  This also still needs value adjustments, shadows, details, and refinement as well as the masking fixes.

10/13/16

Wakefield Vet Class

UArt Sanded Pastel paper 600 grade.  We have used white, canary yellow, sienna brown, cad orange, spanish orange, scarlet lake, and black so far.  Shade the areas with graded color (go from light to dark).  Use white for highlights.  This is at the beginning.

CW Sertoma October and November 2016

Worked on this upright, wet-on-dry.  I started at the top using very light color and a loaded brush.  I kept a drip on the leading edges. I used prussian blue and lemon yellow and made mixtures leaning from very yellow green to green to blue green.  I covered the background and leaves.  I left the entire petal area white.  After that dried I painted the leaves using the same colors with a bit more pigment.  next I painted the yellow areas under the petals.  These are the first passes and they are very light so far.

Worked on this upright, wet-on-dry.  I started at the top, avoided the snow areas and the ornaments, and worked down.  After this dried I painted the red ornaments and added red reflections.  After that was dry I painted the branches and the blue/silver ornament.  Everything is light so far.

C & C Class

Acrylic.  Wet-on-dry upright.  Using thinned red, we painted the first pass on the radish.

Acrylic.  Wet-on-wet.  We wet the paper, dropped in color on the bottom 2/3 grass area (a mixed green, some yellow, and some red).  We kept it slightly tilted and added salt.  After that was dry we removed the salt and painted light blue for the sky.  After that was dry we transferred the cow drawing.

10/12/16

NCBG IEW October, 2016

Wet-on-wet.  I glazed the upper left dark with yellow.  T started working on the leaves.  I did a wet-on-wet pass on 2 leaves on the right.  I did a wet-on-dry pass to 2 leaves on the left.  I worked on the petals a little as well.

Wet-on-dry upright painting.  Starting with yellow at the top and working down, using light warm and cool yellows, I pained the background and the flower leaving some white areas.  I allowed drips and a splattered a little.  After that was dry I used light blue (ultramarine) and painted blue in the background and over the leaves and stems and middle of the flower.  I avoided the flower petals.  After that was dry I used a red, still very light, to start shading the petals and the center of the flower.  The key for the first 3 or so passes is to keep it LIGHT.  I consider this my under painting.

Pouring.  For the first step I used masking fluid to mask all the white and really light areas.  I mixed a red and a yellow.  I sprayed the paper with a spray bottle.  I poured the paint and sprayed a little as I poured.  This is a VERY light layer.  I will mask a few more areas before the next pour.

10/6/16

Wakefield Vet Class

We started working on the flower petals.  I used white, pomegranate, true blue, and a little bit of indigo.

Continuing Watercolor, Sertoma, August/September/October 2016

I worked more on the face, adding some shadows.  I also worked more on the head scarf.

I aded some shadows and the stem as well as the center of the flower.  It all needs more work og course.

I worked on adding shadows and details to the cow.  He needs a little more work.

C & C Class

Acrylic.  I added a little dark around the flower to pop it forward.  I did a little more with the white, adding highlights.

I started working on the petals and added a leaf I had missed.