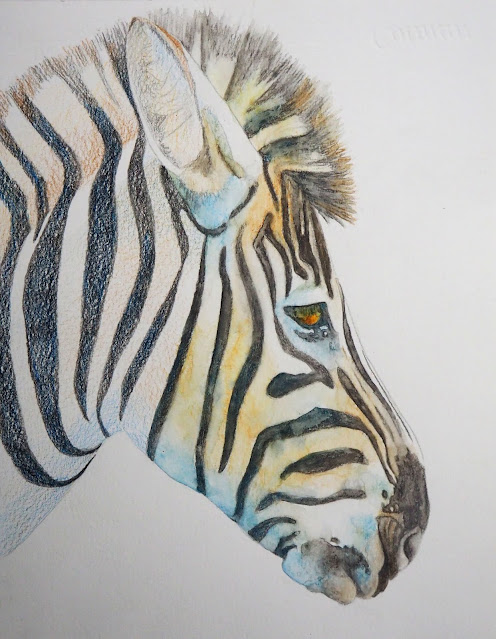
I started lightly shading with Burnt Ochre (reddish brown) and Dark Chrome (warm yellow). I shaded these colors lightly and loosely around the zebra. I added Chrome yellow heavily in the eye. Don't be concerned if you do not have the exact colors. We could change these colors if we wanted. We could make a zebra with purple and green undertones.
Using Warm Grey V (a medium dark warm gray) and Warm gray II (a light warm gray) I started adding the stripes and the muzzle (I finished adding the stripes before going on to the next layer, I wanted you to see the zebra with and without the stripes in one photo). I also started lightly adding Pthalo Blue (a green blue blue).
I added black and Raw Umber (yellowish brown) to the color palette. I added black to the stripes and also added pthalo blue in some areas of the stripes and burnt ochre in other areas of the stripes.
I wet the front part so that you can see where this is going. I left the back part dry pencil so you can see how different it looks once water is added.
I added white to the palette. I wet the back half and realized I forgot to continue shading the ear, oops. After the back half was dry I used more of the same colors adding textured and detail as well as some form. I am shaping the zebra and I am adding the fur and mane texture. I used the white to lighten areas and to add fur and mane texture.
This is where I catch the ear up to the rest. I shaded the ear (using Burnt Ochre, Warm Gray V, Warm Gray II, and Chrome Yellow) and then added water.
After the ear was dry, I used an eraser along with White, Black, Burnt Ochre, Warm Gray V to add the various hair texture and to shape the ear.
So at this point the zebra could be finished. But I will continue refining the values and details.
Even though I like this with a white background, I have added a background so that you can see how that looks. I will post those photos before next class.
I will go through all of this and more step-by-step over both sessions of this class so that it will make more sense.


