11/15/17

Sertoma Continuing Watercolor October & November 2017

I darkened the background and made it have some texture.  I might glaze some yellow in, possibly.  I used gouache to clean up some edges. This one is very close o being complete.  Might do some nit picky things here and there.

I softened the transitions in the face with a soft brush and water and a paper towel.  I added dark and texture to the hair.  Have more texture to add, especially on the top and down the front of the hair.  I added more darks to her face as well as very light color.  It still needs quite a bit of work and some small corrections here and there (her left eye is one), but it's coming along.

I used gouache and scrubbing to fix some edges (there is more to do).  I plan to add some paths of dark and to scrub some dark from the middle and add some light color and to detail and add values to the leaves and lemons.  I like what I have but it need a lot of fixing and refining.

NCBG IEW October & November 2017

I added dark to the right side before class.

I used this to show using a scubbie brush (vein on front leaf) and gouache (lightened the brown leaf on the right, plan to glaze it with color and added a highlight to the front leaf).

Worked on the leaves, pear and branches adding color and values.  Done before class.

Scrubbed out the branches and added some on the leaves and the back pear making some areas lighter.  Added some red and dark to the bottom of the pear and on the left side.  Showed some texture on the back pear.
 
Started adding some texture to the leaves and more darks to the shadow areas before class in the area on the upper left so that during class I can remove the masking and show how to "reattach" the masking areas to the painting.  

I demonstrated the texture on the leaves - scribbling/scumbling with various greens ranging from yellow green to blue green.  I added more darks to the shadows.  I removed the masking.  The first step to reattach it is to run over the masking areas with a watercolor brush and water.  I often use a paper towel as well to lift the excess water and color.  Then I used light glazes to color and/or texture some of the white areas.  I also darkened a few areas that are in shadow.  There are areas, especially the veins, that still need some shadows in order to lay them down onto the cabbage.

Reminder - On all demos I work on only parts of the painting for demonstration and time purposes.  If I were working on a piece at home I would build the entire piece up as i was working.

I started this at home so that I could demonstrate adding a background.  The first step was to wet the paper and add some color (a green mixture of blue green and yellow green)  It was done upright so the paint would move down.  I covered everything and then used a dry paper towel to life out some light areas at the top of the asparagus.  I started shading the artichoke with the same color mixtures.  I made areas darker by adding several layers of color (letting each layer dry).

I demonstrated the background on the left side.  First I wet the paper and dropped in color.  Then I added sea salt.  After it was dry I used rich green gold (a yellow green) and glazed.  in the very upper left I glazed with some red.  I aslo used the same red on a few areas of the artichoke.  I will continue by finishing the background and then adding more form and details to the artichoke.

11/13/17

BAL MM October 2017

Colored pencil over watercolor and watercolor pencil.  I did a lot more colored pencil work since class.  It's finished for now...  Still might do more later.

NCBG IEW October & November 2017

I have added the dark shadow areas which helps to start defining the cabbage.

11/10/17

Sertoma Continuing Watercolor October & November 2017

I demonstrated scrubbing and lifting in the background mostly and on a few lemons and leaves as well.  Scrubbing is done with a scrubber (stiff bristle brush) which changes the paper and lifting is done with a soft brush and does not change the paper.  I lightened some areas mostly with scrubbing and also with some lifting.

I only did a little on this.  I demonstrated lifting on a few cranberries and worked a little on the glass.  This needs the dark background.

I wet the hair and dropped in a mixed orange color first.  It was a light wash.  I added some darks to the face with more skin color and a little skin color with a small amount of blue added (to make it head towards brown).  I also added blue to the hair color to make it more brown.  I then wet the hair and dropped in the orange-brown color in the dark areas of the hair.  I added dark skin color to the arm. I added the pupil and darkened the nostril and lips.

11/7/17

NCBG IEW October & November 2017

I worked on another petal, adding the light gray shadow.  I added yellow to the previously painted petal.  I added shadows to the brown stem right under the flower.  I showed the use of the magic eraser (green leaf on the right side) and the use of a scrubber brush on various stems (always try a soft brush and a paper towel to remove paint before trying the scrubber or the magic eraser as they change the texture of the paper and how it paints).  I mixed 2 darks - one leaning green and one leaning a little warmer (a mid dark).  I wet the area around the flower and painted the area with the 2 darks allowing background color to show through.  I worked a little more on a few of the leaves.

I added some shadows to the pears.  I need to continue with the shadows and glaze some warm yellows and yellow greens as well as some texture.I added textured shadows to the branch.  I added a shadow to a leaf.  This needs shadows and details as well as glazed color.

Pouring.   First I poured a light purple that leaned a little red.  After it was dry I masked the rest of the veins/ribs.  After that was dry I poured 2 greens, one was very yellow and one was a mid green.  After that was dry I poured a bright yellow (mixed my warm and cool yellow).  I dried that and started painting the shadows. Two were just green (but varied) and one was green with a red-purple dropped in as well.  I will continue with the shadows as they are helpful for defining the cabbage and will help it start to take shade.  After the shadows I will either remove the masking and start painting texture, detail, and more shadows OR do one more round of green with a texture and then remove the masking and start painting (I am leaning towards the second option, but either would work).

11/2/17

Sertoma Continuing Watercolor October & November 2017

I added more of the background (with a little more work to do) and added bright yellow to some of the lemons.  I need to shade them still.  I also need to work on the leaves and stems still.  Will do this in the next class.  This piece has some unfinished areas.  I do this for demonstration purposes.  This is not the correct way to work.

The first thing to do is run a damp/wet brush all over the masking to soften the edges.  After that dried I started lightly painting and shaping some of the masking.  I still have a little more painting and shaping to do.  I scrubbed the table and did a glaze of yellow.  While it was wet, I added brown on the bottom edge and corner as it needed something.  This will also help to stop the eye from traveling off the page.  I painted the yellow over the shadow as well and blotted out a middle of the white part of the shadow (did not want it to be bright white).  I still need to add a dark to the background.   

I mixed a skin color - quin. rose and quin. gold. and a lot of water.  I then wet all the skin and did a light wash attempting to work around 2 highlights on her skin and 2 highlights in her eyes, 2 out of 4 is not bad...  I remixed the skin colors with a little more pigment to water ratio.  It was not dark, just a little darker than the first batch.  I started working on the shadow areas.   This was done wet on dry.  To soften an edge wet on dry - paint the darker area, clean your brush, dry it on the towel, and use the brush to pull the paint out to soften the edge.  This takes practice.  For the third pass I mixed a brown for the eyes and painted those working around the highlights.  I painted some skin color in the nostril and added some brown to the inside to darken it a little.  I used the same skin clor to work around the eye on the nose, eyes, mouth, and larger shadows (need to shadow the arm still).  

11/1/17

NCBG IEW October & November 2017

Pouring.  This is the transferred drawing with the first round of masking.  I concentrated the masking in the lightest section of the cabbage (upper middle).  I did a little of masking all around, but kept it to a minimum outside of the lightest area.  The masking looks grey (or slightly blue in the areas that were not dry when I took the photo).

NCBG IEW October & November 2017

Wet-on-wet.  I painted more leaves, did a second pass on the front leaf, added brown to the stem.  I painted a few leaves flat to show  how to add form with lifting or scrubbing (2 methods for fixing watercolor paintings).   Need to add shadows and details to the leaves and stems, shadows on the petals, and darks to some of the background.

Wet-on-dry.  I worked upright, on an easel with wet paint on dry paper.  I worked with very light colors (a lot of water and a little pigment).  I made 2 very loose passes with yellow and green and then after that was dry some red.  After those dried I worked with slightly darker pigment (a little more pigment and water) and started painting the objects.  Still worked wet on dry.  On the branch I used 2 browns (a warm and cool brown), put in the pigment, and dotted it with water to create texture.  I will add shadows and lift/scrub the light areas.  For the leaves I made one pass.  Need to add shadows.  Only made one pass on 2 of the pears.  Need to add shadows and details.

10/29/17

Sertoma Continuing Watercolor October & November 2017

I worked on the cranberries adding brighter red as well as shadows.  I did these in layers and sections allowing things to dry as needed.  I also added some yellow at the end.  I added some darks and color in  the vase area.  I added a little red to the shadow of the vase.   I did what I needed to do before removing the masking. I did not work on the table or the background.

I removed the masking and will do no more before class.  You can see how the white looks pasted on.  The next step is to work the white into the painting - to re-attach it.  I will also add a layer of dark to the background (which helps in fixing the edges).

10/26/17

Sertoma Continuing Watercolor October & November 2017

I shaded a lemon with some purple (very light purple!).  My lemons need work.  I also added some darks to some leaves.  I then started adding the dark patterns to the background.  I used water to map out the shapes and then dropped in a mixed dark (using the 3 primaries, choose your darkest blue to make this), a dark green, and some orange.  I'm going to add some to the middle and start heading down. St some point I might fade it out at the bottom or I might take it all the way down and off the page in some of the areas (not sure yet). 

I worked on shading the cranberries and adding darks in between (need to finish that so I can remove the masking).  I added glazes of orange and a yellow color to the table area.  Added a dark to the background and shaded part of the table as well as the shadow of the vase.  I then added a gold glaze to the background and table again.  Added some color and darks to the vase as well.  Need to add a few more before removing the masking.  After I add some things I will post a photo on the blog. 

10/25/17

NCBG IEW October & November 2017

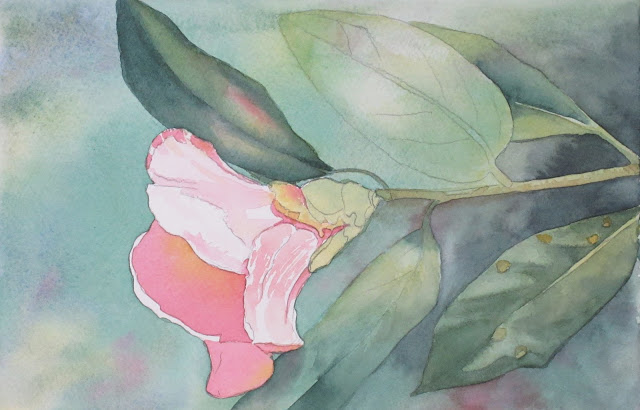
Wet-in-wet Watercolor.  First I wet everything except the white petals (I made it very wet).  I dropped in warm and cool yellow, some green, some blue, some red, some purple (I don't always do all these colors btw).  Then I let this dry.  Next I showed how to soften edges with water and your watercolor brush and a clean paper towel.  Then I glazed rich green gold on the left side of the flower and showed you how to feather the edge.  To feather an edge clean your brush, dry it off most of the way, and then use the brush to pull the edge out to lighten/soften.  Do not go in with a wet brush or you will make blossoms.  Next, I wet the left side leaf.  It was less wet than the background.  I mixed a green (I used quinacridone gold and pthalo blue which is a warm yellow and a green blue).  I started on the left dark edge, cleaned and dried my brush, and pulled the color in toward the middle.  I repeated this process working dark to light all around the leaf and then from the middle out on the right side of the stem.  The leaf on the right was done wet on dry just for practice.  It needs a few more steps to be complete.  Next I mixed a gray with my primary colors.  I used ultramarine blue, quinacridone rose and quinacridone gold for the gray I used.  I made a light mixture, wet the petal (same wetness as the leaf) and worked from dark to light using the feathering technique.  I will continue demonstrations in class on this piece.

10/24/17

BAL Mixed Media, October 2017

Watercolor pencil under painting with colored pencil just started on top.  This is very much at the beginning (it's a good start and has a long way to go).

The start of a colored pencil woman superimposed over a watercolor painting of a man.  I start with white (a value study) and later will add color.

Sertoma Continuing Watercolor October & November 2017


I have done a second round of masking.

10/19/17

Sertoma Continuing Watercolor October & November 2017

After transferring the drawing I went over some areas with a pencil to make sure the drawing would not disappear.  Then I wet the entire paper. I made it quite wet.  I dropped in 2 mixed greens and a warm and cool yellow.  After that dried I started on the leaves.  I used a few greens and painted the color leaving some white spaces and adding a tiny bit of red here and there.  I painted the yellow on a few lemons making them round by putting in the darkest area, rinsing the brush, drying it off and pulling the paint out and around.  Before the next step I would finish this one, all the leaves and lemons with their first layers.

After masking (which is the gray) I painted a first pass of color into the vase. I added light red, some green (since I planned for my background to be green), some blue, and some yellow.  I painted some green on the background and dropped in water right as the paper was beginning to dry to make blossoms.  I painted yellow on the table and red in the shadow of the vase.  I painted red on the shadow of the table.  I painted some yellow onto some of the cranberries.  My next step is to apply a bit more masking.  I will post again when that gets done.  You can be fairly free with the color, using the colors you prefer, just keep these first passes on the light side.

10/18/17

Sertoma Continuing Watercolor October & November 2017

The drawing is transferred and I used masking (Pebeo Drawing Gum) on the lightest areas.

10/17/17

BAL Mixed Media, October 2017

Colored pencil over watercolor and watercolor pencil.  I glazed some yellow on the background.  Need more glazing and some refining, but am getting close to done.


This is an example of superimposing one image in colored pencil over a watercolor painting.  This is how I start the process.  I transfer the drawing and usually start with a white pencil laying in the light values first.

10/10/17

BAL Mixed Media, October 2017

I did another layer, using watercolor pencils to make the gorilla darker and to add more color and texture.  Since the gorilla is dark I wanted the under painting to have lots of color and to be rather dark so that the colored pencil work would be lessened considerably.  After the watercolor pencil layer dried I started working with prismacolor colored pencil. I started with white on the face and hair/fur and I used black in some areas focusing on the values primarily.  I added color as needed using dark brown, canary yellow, scarlet lake, and true blue.  But most of the color comes from underneath, from the under painting.

I worked on the plate and the brass mostly as well as the wooden handle.  Need to add more color in some areas.

10/8/17

BAL Mixed Media, October 2017


I finished the dark layer of watercolor.

I worked to get this further along for next class.

10/5/17

Sertoma Continuing Watercolor September and October 2017

I glazed the background with a muted purple (I used ultramarine blue, quin rose and quin gold).  I will finish this with more darks and details.  It still needs work, the detail work I showed you on the rooster.

This is how the rooster looked last week after class.

This is how the rooster looks after  some of the finishing detail work I do on paintings towards the end.  I focused on the head area adding lights, darks, and details.  This part is drawing with watercolor.  I will do a bit more before being done.  I also showed you how to use white gouache on this one.  But remember, some of you will not be detail oriented and could stop earlier than I will.  I do the detail because I enjoy it and like how it looks.  But it is not always necessary.

I worked on the beard and hair with a gray watercolor and white gouache.  I worked on the scarf, the shirt, and glasses and the hat.  On the scarf I put in shadows and then later glazed it with purple.  On the hat I put in the shadows and then later started putting in the plaid.  Overall this needs more darks and details.

I started this by wetting everything except the flower.  I mixed several greens and dropped them in.  I kept lifting the light areas on the leaves with a watercolor brush (that was dried on my towel).  I also dropped in some red.  I let this dry.  Then I made the greens darker and mixed a dark background color.  I started putting the dark into the background (for demonstration purposes I did not finish the background).  I then started working on leaves adding darks.  After things dried a bit I worked on the flower.  I wet the big dark petal and used a mix of  my warm and cool reds (quin rose and pyrrole scarlet).  I dropped that in and then added some quin gold. I used the mix of reds at various strengths (changed with water) on the flower petals.  I used a yellow green at the base of the flower.  I will add dakrs and details all over this painting as needed to finish. 

10/3/17

BAL Mixed Media, October 2017

Transferred the gorilla drawing to the watercolor paper ( I used Cotman cold press 140 lb.).  First I wet the gorilla and dropped in color.  I used the primaries.  Use colors you like.  I then splattered the painting on the gorilla and background.  After that dried I mixed 3 darks - a warm, a cool, and a more neutral dark (I used my primaries to make these darks). Then I started painting the darks adding texture.  I am not finished and you can see the colors underneath in areas.  I will finish painting the dark before adding colored pencil.

I am working on arches 140 lb. hot press paper.  This piece was started by wetting the paper (very wet) and dropping in color and moving it around.  Then I used salt for the texture.  After that was dry I glazed a yellow to diminish the brightness of the salt texture.  Then I started with white colored pencil doing a value study.  Normally I would finish with the white before adding color, but for demonstration purposes I started adding the color.  I have used cadmium orange hue, scarlet lake, canary yellow and black so far.

This is from another class.  It is the start of a colored pencil on black paper.  I wanted you to see an example of the white value study before I added color.  You will do something similar on your watercolor background and then use black (or another dark) for the very dark areas (since our backgrounds aren't black like this paper).