9/15/16

Continuing Watercolor August/September/October 2016

Worked on the head area.  Added darks, shadows, and some details.

This is the upright painting on the easel.  I started with the skin using a blue, yellow, and 2 reds (warm and cool).  These colors are VERY light and form an under painting.  I put the yellow in the white areas and the blue in the shadow areas.  I pulled the color out into the background.  I allowed drips but they are optional.

I added a warm yellow over the petals.  I then painted the middle part with a dark.  I worked on darkening a few shadows as needed.

C & C Class

Acrylic.  This the second part of the under painting. I like to get color underneath some of the dark areas as it will show through and be more interesting.  I painted all the areas with various colors on the pelican as well as gray on the body and the piling.  I painted some white on the front of his head and beak (To correct the shapes).

I used a mixed gray and painted a medium light value from the red on the back of  the head down to the tail except for the wing.

I painted more yellow on the head and chest area.  I painted a light very blue for the eye. I mixed a medium dark and painted the back of the head (the red area) leaving a little red at the top and blending it.  I painted down the neck and body to the tail.  I fixed the shape of the yellow spot on his chest and made it look like feathers.  I painted around the second leg (negative painting) so it would show up.  I left the part of the body by the wing light and painted a shadow under the wing.  I did a little light painting on the wing as well.  I painted green and brown, lightly, on the piling. I painted white on the red drip behind his head.  The drip on his body will go the more I paint the body.


9/13/16

BAL Colored pencil and Mixed Media, September 2016

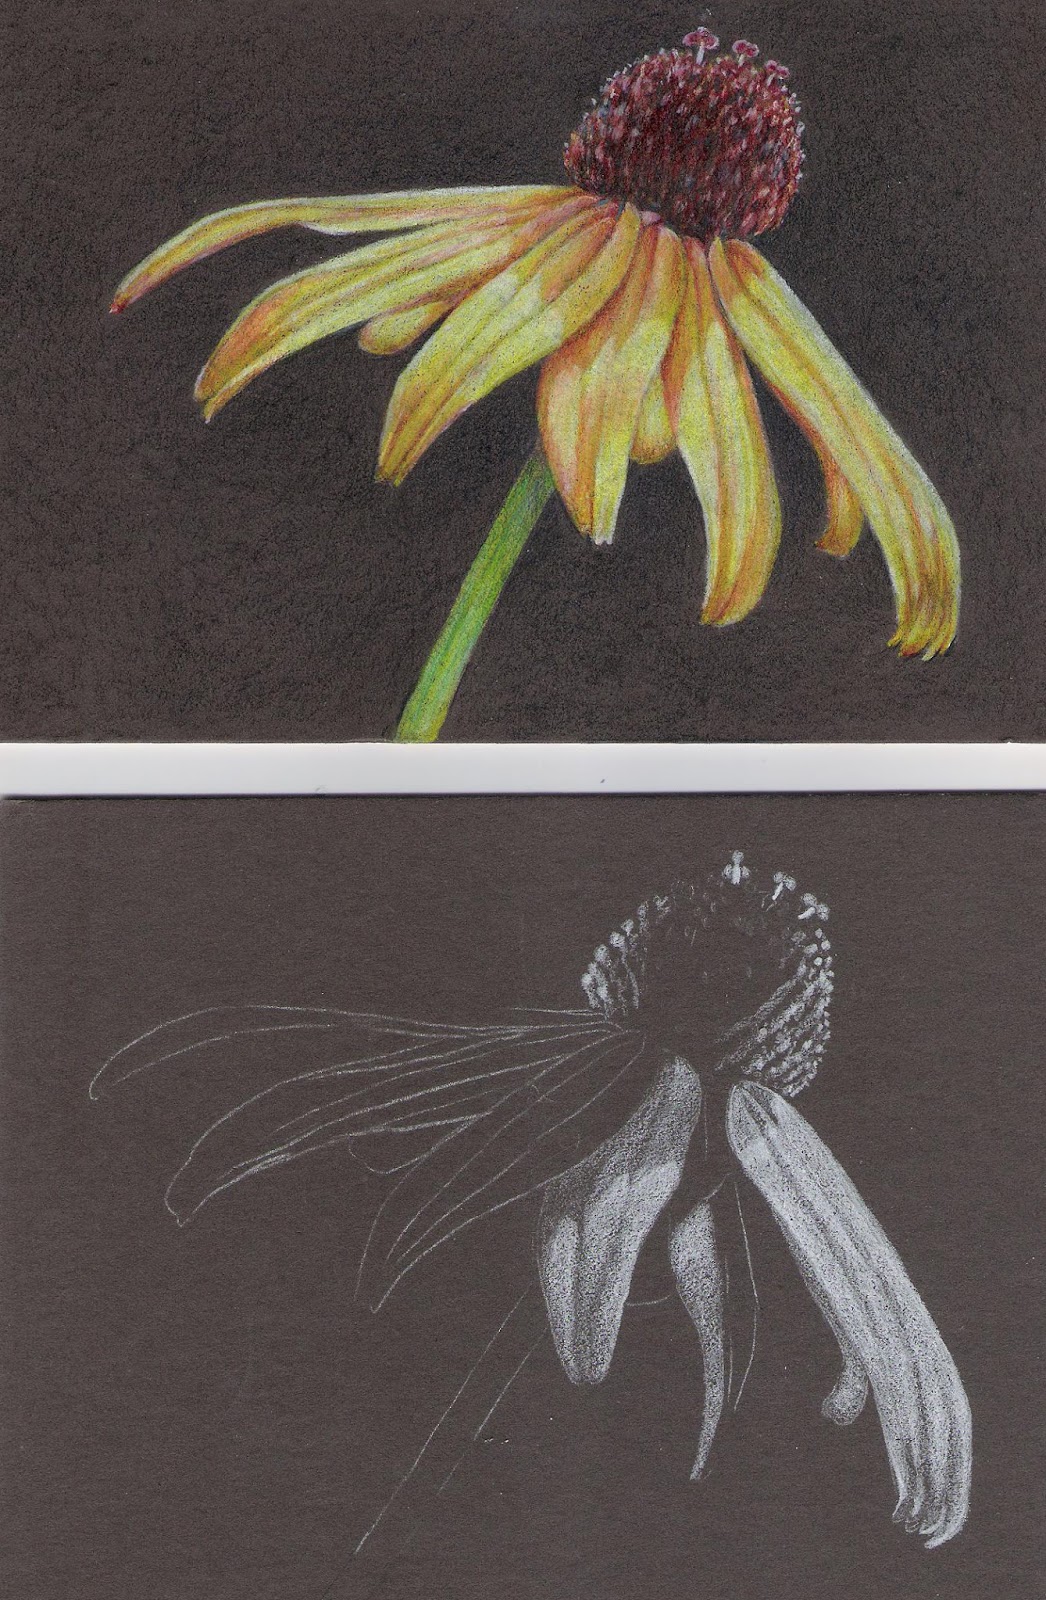
Colored pencil on dark.  This will help when you use colored pencil over a medium to dark watercolor or acrylic background when we do the mixed media.  I transferred the drawings and then started with white. I did a value study of the flower in white (as you can see by the 2 outside petals I started).  I also did the middle of the flower in white, paying attention to the lights and darks, the values.  Next I used canary yellow over the all of the white. I reapplied the white to the lightest areas.  I then used scarlet lake on the shadows paying attention to the values and color. Next I used a warm yellow (could also use an orange or a light layer of scarlet lake and canary yellow) over the petals and middle.   

I used indigo blue and pomegranate as well as a little true blue so far.  I am doing a light  layer first, laying in the values as a road map of sorts.  I will do the body similarly to the head.  I also put canary yellow on the eye. 

9/8/16

Wakefield Vet Class

I have been adding the shadows on the head and neck and started adding the whiskers.  The whiskers on the face in the white areas need a fine dark line underneath the white line (use very sharp pencils).  The whiskers in the background need a fine white line (sharp pencil press pretty hard).  Neither of these photos are fantastic.  Taken with my phone and not in the correct light.  I corrected them some, but they are just OK.

Added more whiskers and a bit more shadow.  This is getting close, but needs a bit more refining.

Re-posted this since you are working on it currently.

CW Class August, September, October 2016


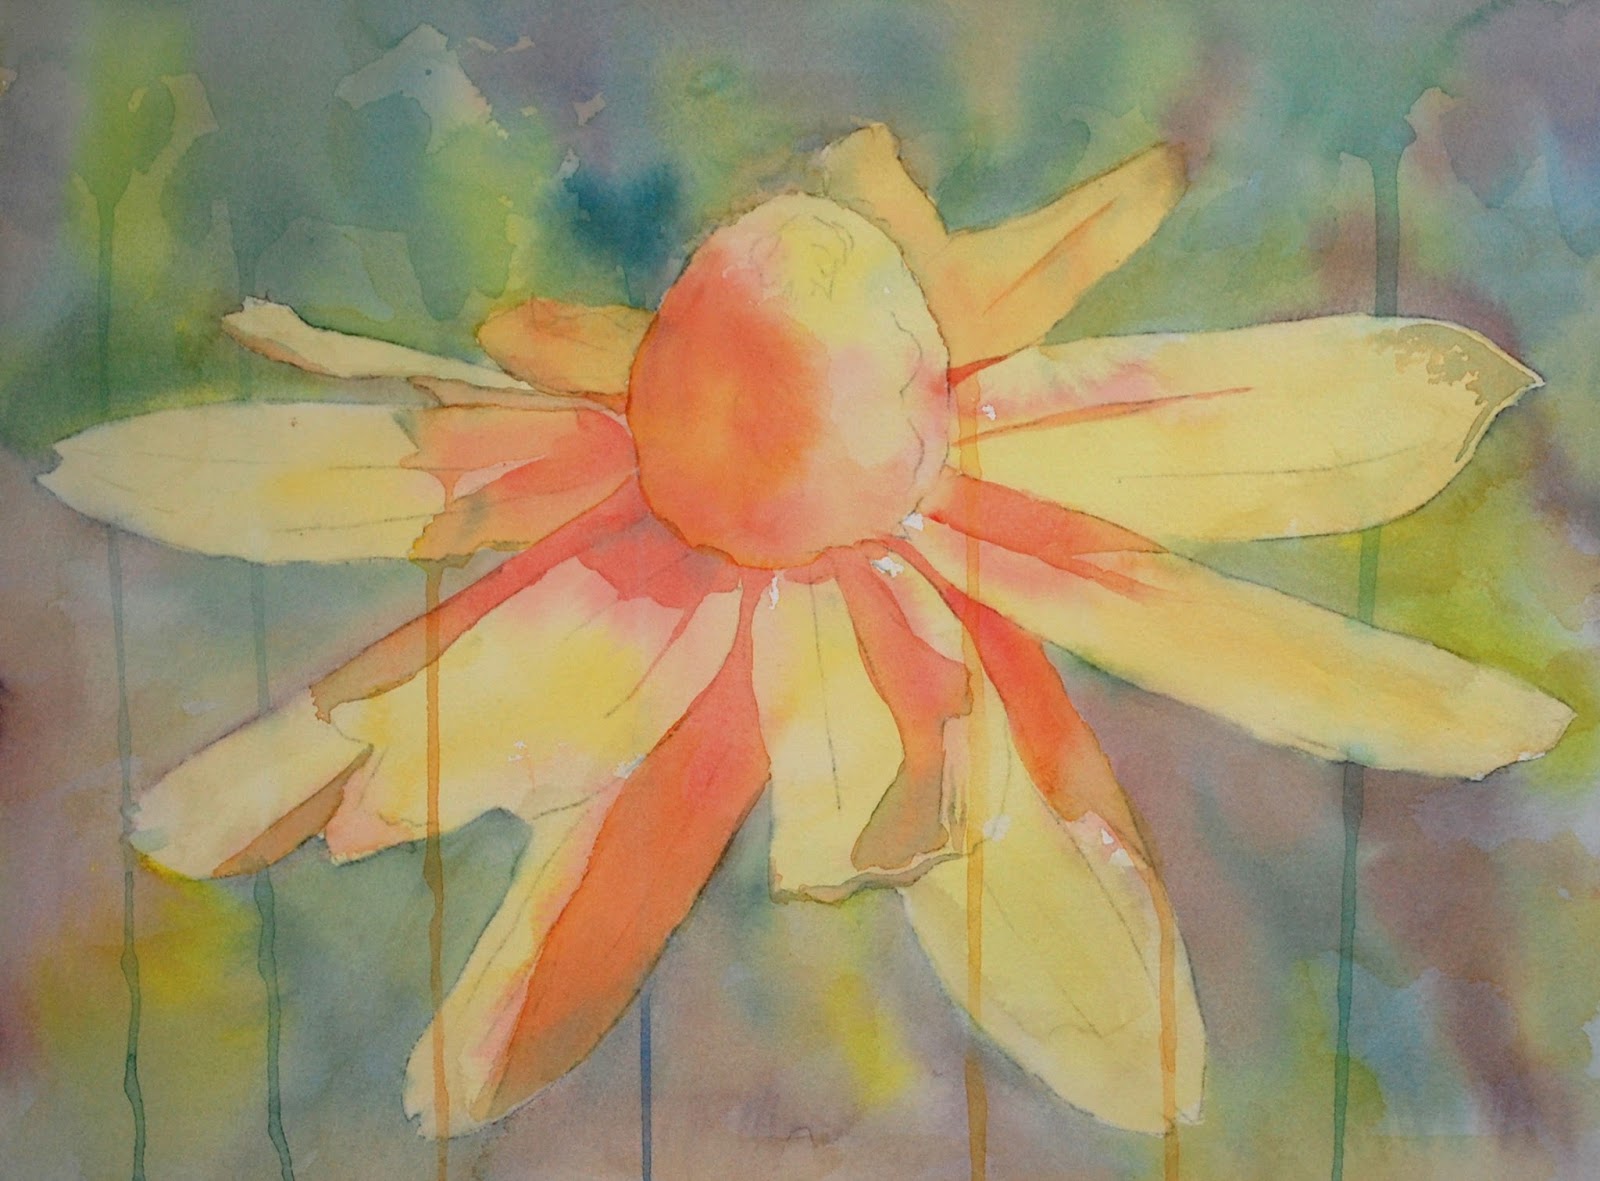
Started adding shadows and some warm yellow on the back petals.  Allowed some drips (optional).  The first 2 photos were taken in class with my phone in poor lighting conditions.  I did some editing to correct the color and value, but they are still not great.

Added more shadows.

Added some more drips, this time for the background.  Made the drips with non staining color (such as cobalt) and then gently and carefully lifted them from the petals while still damp.  Started adding the grey shadows using orange to shape the shadow and then dropped in green.
 
Started adding the body using lots of color and changing the color as it moves down the page.  Also added color and value to the beak.  This first photo was taken in class with my phone in poor lighting conditions.  I did some editing to correct the color and value, but it's still not great.

Did a little more work adding color and value to the head and beak.  Started adding the darks to the tail feathers and legs. Added some more color to the background to accentuate the head and beak area (first yellow in front of the head and beak as well as a little behind the head as well and then reddish purple dropped into the wet paint).  Encouraged some of this to create drips (optional).

C & C Class (acrylic)

We started with a value study approach for the first pass (green only). 

This is almost complete.  After the initial value study we used white as well as darks to accentuate the values.  We added color washes such as yellow and some red.  And we added the details.  This needs a tiny bit of refining, but it is very close to complete. 

We started by wetting the background and dropping in paint to create the background texture.


We did a wash over the background texture.  We painted some local color on the pea flower and leaves.  We used white for highlights and mixed a dark for the flower.  It needs more value and color work and then details on the flower and leaves.

The under-painting for the pelican.  We worked upright and used very wet paint.

The under-painting for the Camellia.  We worked upright and used very wet paint. 


9/2/16

Past classes

Done in a class awhile ago.  Worked on it some more.  The medium is colored pencil on Dura-Lar Matte.  Placed behind it is a watercolor and colored pencil texture painting on watercolor paper.  There is a white paper in the shape of the owl behind the owl so the background texture painting would not overpower the owl.

Done in a class awhile ago.  Gouache is the medium.  The white gouache is painted over a textured gouache and watercolor background.

Continuing Watercolor - August, September, October 2016

Paint with the painting on an incline.  Wet the paper, drop in the color.  (the colors here are a bit muted, this was taken with my phone in poor light)

Work on dry paper, paint glazes of yellow and drop in some red, again on an incline.

Paint in an incline.  Start with dry paper.  Make very wet and light colors, paint loosely.  Use a limited palette.

Again working on an incline and on a dry surface, add ore very wet and light color paying a bit more attention to the subject.

Again on an incline.  Using a little more pigment, start working on the pelican.  You can allow drips to happen or not, up to you.

8/25/16

Wakefield Vet Class August, 2016

Worked on the ear and around the face a bit more.  Also did a little more to the background.  It's not complete, but getting closer.  Remember - concentrate on the values, the lights and darks.  Color is secondary and can be changed.  Color is up to artistic interpretation, the values are the foundation/structure.  Also, to get white hairs on white paper to show up requires negative drawing.  What is put behind the hairs will shape those hairs and make them show up.  

8/18/16

Wakefield Vet Class August 2016


I painted the leaves and stem with watercolor.

I worked on this outside of class adding color, value, and detail.  It still needs more darks and a few more details.

Using colored pencils I started working on cleaning up edges, darkening the background and adding detail and form to the cat.  It has a lot of work still needed to finish.  I am using colored pencil to darken the background, but I could also have darkened it with another layer of watercolor.  Colors used - white, pomegranate, scarlet lake, canary yellow, black grape, black and a tiny of true blue on the cat and dark green, indigo, true blue, and canary yellow on the background) 


8/11/16

Wakefield Vet Class August 2016

I started adding darks and will continue to add darks as well as details.

Watercolor under painting.  I painted the flower with the pink and dropped in some blue.  After this was dry, I wet the background and dropped in paint and added water and helped it move.

I wet the background and dropped in paint.  I added a little paint onto the cat and softened the edge of the cat.  I might need to darken the background with a second round of paint.  If I do this I will post it again. When using watercolor in this manner, wet the background and drop in the wet paint and allow it to flow.

7/20/16

Wakefield Vet Class July 2016


I worked on this more with color (used red, yellow, blue and orange as well as a few areas of white) and then started adding the darks with black and black grape.

Wakefield Colored Pencil Class July 2016

White colored pencil, value study, on dark gray mat board

7/19/16

Wakefield Colored Pencil Class July 2016

Colored pencil on off white mat board.  I transferred the drawing and then started lightly shading in colors.

I shaded in more colors and started adding the values.  I also worked on the eye quite a bit.  It needs more values and of course more detail (I can show you this next class).

Colored pencil on dark gray mat board.  I transferred the drawing with white transfer paper.  The top is a finished flower.  The bottom is the start.  I usually start on a dark surface with white first.  I dd a white value study and then layer the color and detail later.

Colored pencil on off white mat board.  Same process as the emu above, just not very far along.

7/17/16

Wakefield Colored Pencil Class July 2016

View from the black side after adding color on the color side.

Color side - I have added canary yellow, pomegranate, and true blue, often layering to mix colors, to the fish on the color side.  It needs a tiny bit more work - refining and adjusting.

7/12/16

Wakefield Colored Pencil Class July, 2016

I added more black texture and values (light to dark) as well as details to the fish on the black side.  I also then added some white in the lightest areas.


This is the color side.  I added some white in the lightest areas to this side as well.

7/8/16

Wakefield Colored Pencil Class July, 2016

Colored pencil on Grafix Dura-Lar Matte.  This is the black side.  We used a black colored pencil and shaded the values of the fish.  This of course is not finished.

This is a view from the color side.

The process so far:  On the Dura-Lar we marked each side in the bottom right corner.  One side was color and one side was black.  We put the Dura-lar over the drawing, color side up. We traced the drawing with a #2 pencil.  Then we flipped it over and shaded on the black side with a black colored pencil.  This is a value drawing.

7/5/16

NCBG Gouache June 2016

I have added taxture to the mushroom and bottom ground.  I will continue adding texture, adjusting values and details, etc. until it is complete.