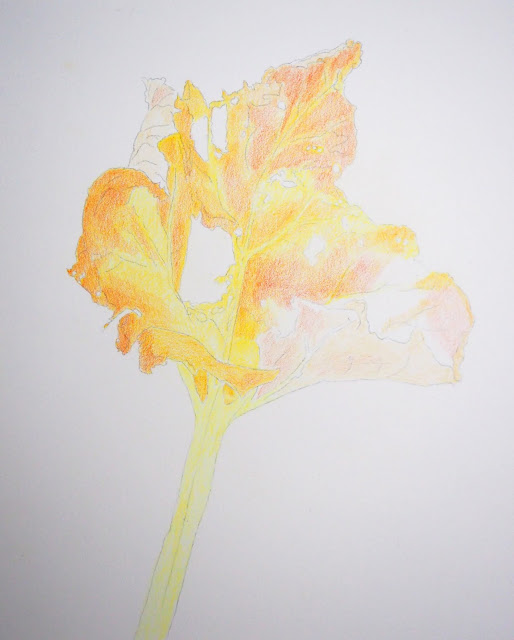
Step 1- add yellow. I used a mid yellow ( FC Cadmium Yellow 107) and a cool yellow (FC Light Yellow Glaze 104).
I shaded the colors using the photo as a guide. The mid yellow was added on the leaf and the cool yellow was added to the stem and some vein areas. I used the side of a sharpened pencils to lay down the pigment. I varied the pressure and amount of layers according to how much pigment I wanted to add to each area.
Step 2 - more yellow. I used a warm yellow (FC Dark Chrome Yellow 109).
I shaded the colors using the photo as a guide. I used the side of a sharpened pencils to lay down the pigment. I varied the pressure and amount of layers according to how much pigment I wanted to add to each area.
Step 3 - add orange. I used a orange to add more warmth (FC Dark Cadmium Orange 115).
I shaded the colors using the photo as a guide. I used the side of a sharpened pencils to lay down the pigment. I varied the pressure and amount of layers according to how much pigment I wanted to add to each area.
Step 4 - add red. I used a warm red (FC Pale Geranium Lake 121).
I shaded the colors using the photo as a guide. I used the side of a sharpened pencils to lay down the pigment. I varied the pressure and amount of layers according to how much pigment I wanted to add to each area.
Step 5 add more red. I added a cool red (FC Magenta 133).
I shaded the colors using the photo as a guide. I used the side of a sharpened pencils to lay down the pigment. I varied the pressure and amount of layers according to how much pigment I wanted to add to each area.
Step 6 - add green. I added a yellow green (FC Light Green 171). This mostly was added to the stem and some veins and a few other small areas on the leaf.
I shaded the colors using the photo as a guide. I used the side of a sharpened pencils to lay down the pigment. I varied the pressure and amount of layers according to how much pigment I wanted to add to each area.
Step 7 - add more green. I added a muted green (FC Earth Green Yellowish 168). This mostly was added to the stem.
I shaded the colors using the photo as a guide. I used the side of a sharpened pencils to lay down the pigment. I varied the pressure and amount of layers according to how much pigment I wanted to add to each area.
Step 8 - add brown. I added 2 browns, one dark brown (FC Walnut Brown 177) and one orange brown (FC Burnt Ochre 187). The dark brown was used to add shadows and the orange brown was used mostly to add color
I shaded the colors using the photo as a guide. I used the side of a sharpened pencils to lay down the pigment. I varied the pressure and amount of layers according to how much pigment I wanted to add to each area.
Step 9 - wet the pencil. Using water to wet the pencil on the right half of the leaf and the stem and front leaf so that you can see the difference between the wet and dry pencil.


