2/24/22

NCBG IEW February, 2022


This is what it looked like before class.

I like this background, but it was too distracting (which is normally the case with these backgrounds).  So I glazed yellow over the bottom and into the middle and then dropped a little extra color (red and brown I think) right after glazing (so the paper was still damp) at the bottom of the paper.  

I added oranges, reds and browns to the stems and some line texture. I started grounding the mushrooms by bringing the darks and browns up into the stems.

I added orange and brown, lightly, onto the middle and right mushroom top.  After it was dry I removed the masking from the right mushroom head and the right stem and worked the hard shapes created back in on the one side using water and a paper towel and color if necessary. 

I worked on some of the dark areas as well and started adding some detail.

I worked on detailing the very top flower using my warm and cool red (quin. rose and pyrrole scarlet) and my purple blue (ultramarine).  I also lifted some lines.

2/17/22

NCBG IEW February, 2022

Some second rounds of rose added to the flowers and branch.  The addition of some blueish purple glaze to a flower (ultramarine with a little rose or you can use ultramarine alone) and some warm red added to a flower.

The branch - I mixed a brown (ultramarine, rose, warm yellow).  I dampened the branch, dropped in some brown on the dark side and helped it move around the branch, and I dropped in some of the color used to mix the brown. While it was still shiny I added salt.


NCBG IEW February, 2022

This is how the mushrooms looked after class.

This is the painting of the background while wet with the salt newly added.

This is how it looked after the salt activated and the paper dried.  The salt worked very well.  It will most likely need to be toned down with glazes.

This is how it looked after I added a second round of masking fluid.

Textures - Bubble wrap, wax paper, a few stray salt pieces, and blossoms made with drops of water.

Textures - plastic wrap

Textures - Salt

Textures - blowing through a straw, sponging (bottom right), paper towel lifting (top left).


Kate Zoom Watercolor Pencil Class Feb. 2022

This is how it looked at the last post.

I worked on this while at the brewery.  I darkened parts of the background and did more negative drawing around the crown.  I also started organizing the feathers.


2/16/22

NCBG IEW February, 2022


This is what was done after the redbud painting video.

This was what it looked like after a work session this morning.  I started layering the first and a few second passes on the redbud flowers.  I will demonstrate further in class.


This was after the first video about painting the background.

This was after the second painting the background video.

2/15/22

Kate Zoom Watercolor Pencil Class Feb. 2022

Working on dry paper, I used a black watercolor pencil and several grays that I had.  I outlined some of the feather lines so that I can see them and added some of the black and gray inside the shapes.  I shaded on the shadow side of the neck as well. 

I wet the feathers and the neck, I was not neat or careful as I wet it and I moved the color around.  I added some negative color on the crown and wet that as well, dabbing the color around on the crown.  I will show this in class on small sections.

This is what the crane looked like after our Zoom class today.


2/10/22

NCBG IEW February, 2022

I have added more darks, some details, and the background dark on half.  

I started painting the redbud using quinacridone rose.  This layer will be started as a monochromatic layer.  We will glaze and add color, value, and detail on top.  I will demonstrate this in the next classes.

This is from another class.  This is after several passes with the rose.

This is a preview of the next steps with the start of glazing and color over the rose layer.


2/8/22

Kate Zoom Watercolor Pencil Class


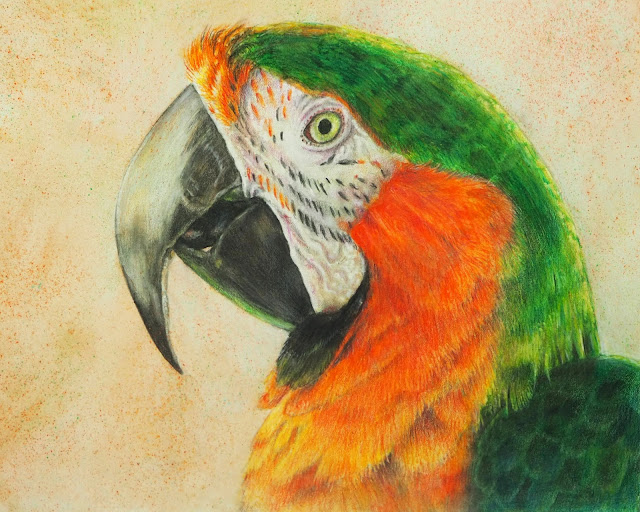
Watercolor pencil under painting/drawing.  I used pencils from both Faber Castell and Winsor & Newton (yellows, browns, black, blues, green, grays).  I am working on cold press paper (I usually work on hot press when it's this small).  The under painting/drawing will be complete once I work on the feathers on the body, the neck feathers, and the negative painting/drawing work on the crest.  I might also work a little on the background (and save a spot to show you in class next week).


2/4/22

NCBG IEW February, 2022


The stretched paper after it has dried.  It does buckle some after I add the staples.  It could be that I am too impatient to wait long enough for full stretching, but the paper dries very flat and tight and stays mostly flat when I work.  If it buckles a little I ignore it.


I add the tape on stretched paper for classes or workshops because traveling often causes the staples to come out.  If the paper is staying home I do not add the tape.  I don't add the tape until the paper is dry.  When I remove the tape at the end I remove it when the paper is dry and I remove/peel it slowly so I don't damage the paper.  I use 1" painter's tape (unless I am out and only have wider tape which happens)

2/3/22

NCBG IEW February, 2022


This is a photo of the artichoke after class.  We wet the paper and added a warm and cool yellow.  After that was dry we started working on the first layer of green.  After that we worked on adding darks and shadows.  

We are concentrating on water - the amount of water on the paper, in the brush, and in the paint and what that all looks like as you paint.  This painting is practice for gaining an understanding and control of the water.

This is what it looks like after the video and after a little more work later on the unfinished petals.  I also add more darks and lifted and softened a few areas (with a soft brush, water, and a clean paper towel).  Next class I will add some glazes and more darks as needed.  I will also detail some of the areas so that you can see how I approach detail.  The detail part is done dry and will be more familiar to you all.  At some point I will also add a background.


2/1/22

Sketchbook Skool Watercolor Pencil Workshop


Winsor & Newton Studio Collection Watercolour Pencils on W&N hot press watercolor paper

1/25/22

Kate Zoom Watercolor and White Gouache Class


I wanted to point out that this would look nice with a light background as well.  It would be a different process.

This is how it looked at the end of the Zoom video from Jan. 18

This is how it looked at the end of the Zoom video from today, Jan. 25

This is how it looked at the end of the 2 extra videos


1/18/22

NCBG Painting and Drawing with Watercolor Pencils January 15, 2022

This is how the tomatillos looked before the additional work on the extra video.  

I worked on the left tomatillo on the upper husk.  I have more work to do in that area, but it's the same as was shown in the video.  I'm getting very close to being finished.


Kate Zoom Watercolor and White Gouache Class


This is the first layer of very light color.  The main purpose of this layer is to add color to the flowers.

This is how it looked at the end after adding color and value to the flowers (I still need to paint the little curly things on the front of the top left orchid...).

I mixed a brown with the 3 primaries (red, yellow, and blue) using more yellow and red in the mixture so it becomes brown.  I wet the background and then dropped in the color.  I also dotted it with blue (you can add blue or another color if you feel so inclined). We now have the underpainting done (except I still need to paint the little curly things on the front of the top left orchid, I keep forgetting).


1/17/22

CPSA Chapter 114 mini workshop, watercolor pencil


Using all of the colors used during the mini workshop as well as erasers and a white watercolor pencil, I made changes, correction, and added texture, color, and detail.  This is getting close to being finished.  I will spend a few weeks looking at it and making any additional changes/additions if needed.

NCBG Painting and Drawing with Watercolor Pencils January 15, 2022


I have worked on this more.  I have added details and made corrections.  The details and textures were added by using the erasers and the white pencils for light areas and adding darks and medium values with the watercolor pencil colors (dry).  The top left is unfinished still, it needs lights and darks plus details and texture.


1/15/22

NCBG Painting and Drawing with Watercolor Pencils January 15, 2022


This is how it looked after wetting and adding the yellow and the sanding texture.

This is how it looked at the end of class.  I have started on the dry work.

NCBG Painting and Drawing with Watercolor Pencils January 15, 2022


This is about 90% complete.  I have added layers of dry watercolor pencil (could switch to colored pencil for this part).  I have run a damp brush over the sanding texture in the background.

I will take a few weeks to look at, study, and make additions or corrections and any changes needed.  This is the process for my art towards the end.

This is after wetting the background and adding a texture called sanding.  We will do this on our pieces in class.

How it looks after it is dry and the plastic wrap removed.

This is after the pencil was activated/wet with water and a brush.  I added plastic wrap to make texture on the left side.  We will not do this to our pieces in class because it takes too long to dry.  But we will do this as an exercise.


This is the start of layering the dry watercolor pencil.